- Step 1: Installing step-ca
- Step 2: Installing step-cli
- Step 3: Add the certificate to FortiGate
- Conclusion
Own CA server with step-ca
Install an own CA server at home and generate a certificate for FortiGate
Written by Remco Kersten
To make my home network safer, I added a FortiGate between my router and my home network. The FortiGate comes with a self-signed certificate for the webinterface, but I want more protection because I don’t trust my cat. So, I’m going to create my own certificate authority (CA) using step-ca. This way, I can manage and revoke certificates if needed.
Step 1: Installing step-ca
First, deploy step-ca as a Docker container with Portainer (which is a tool to manage Docker containers), but you can also do this directly using Docker or on different operating systems without using Docker.
- First set up a DNS entry pointing to the step-ca server on your local DNS server.
- Create a storage volume in Docker
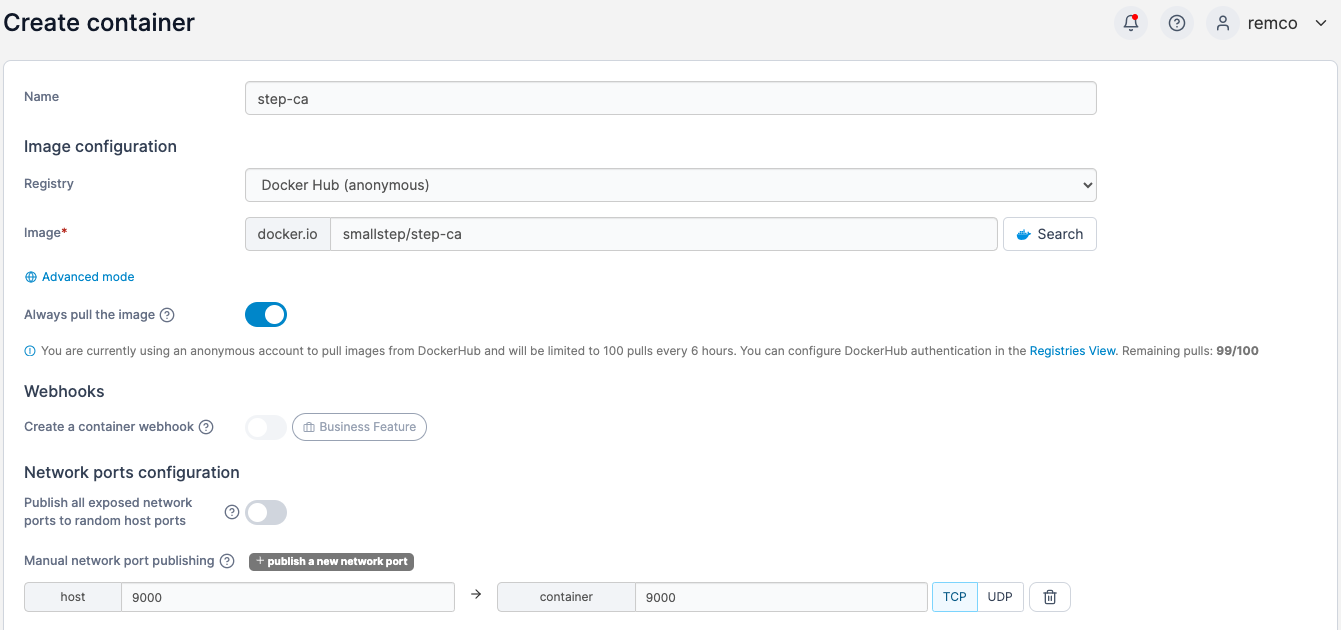
- Create a new container. Name the container whatever you like, use the image smallstep/step-ca and map port 9000
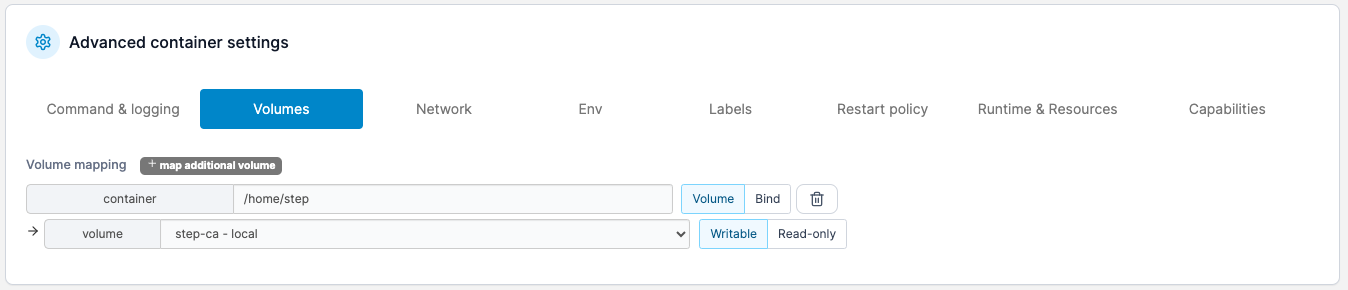
- Connect the volume created earlier.
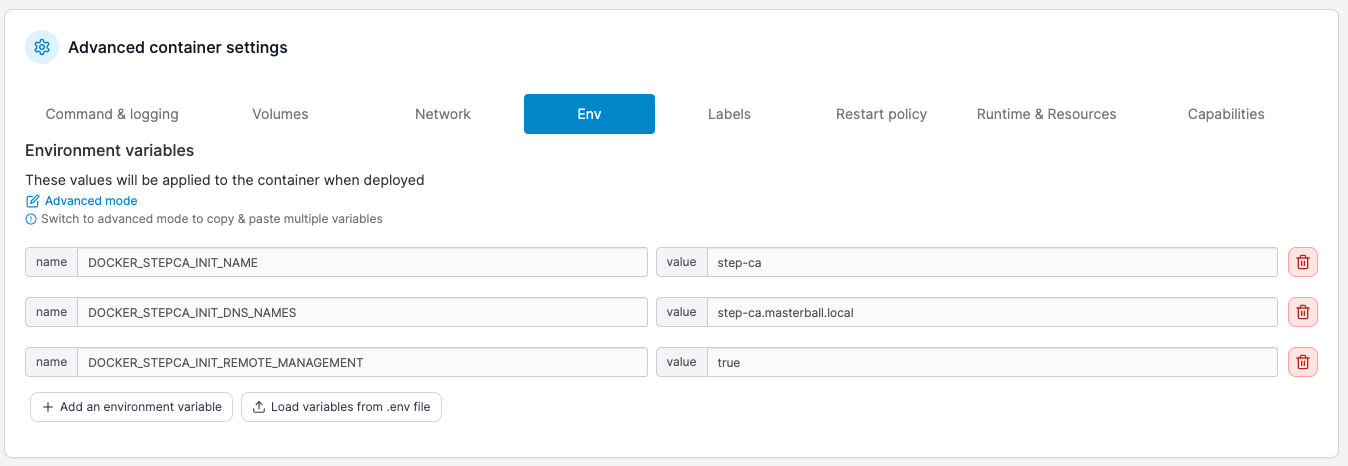
Set the following environment variables:
- DOCKER_STEPCA_INIT_NAME: the name for your new CA server
- DOCKER_STEPCA_INIT_DNS_NAMES: FQDN for your new CA server
- DOCKER_STEPCA_INIT_REMOTE_MANAGEMENT: true
- Deploy the container.
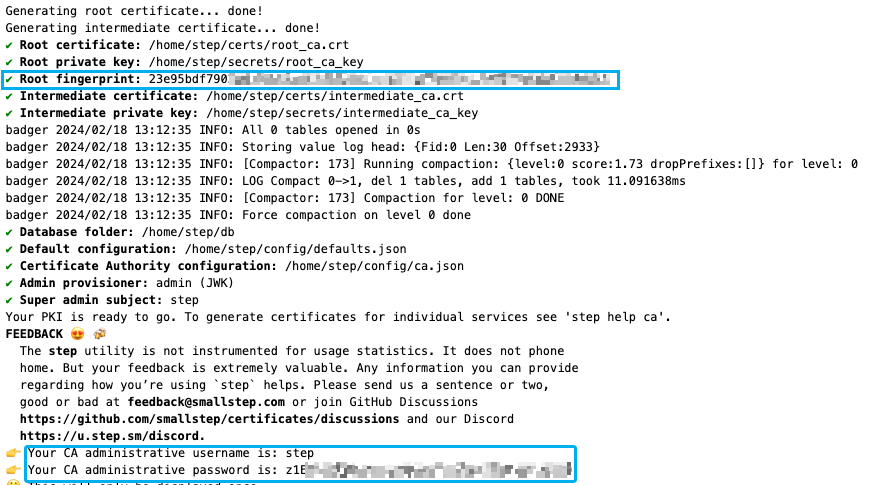
- Save the administrative username, password, and root fingerprint from the container logs in a secure place.
- Check if the server is running by going to
https://<step-ca-domain>:9000/health
Step 2: Installing step-cli
- Next, make sure you have step-cli installed on your workstation. On MacOS, simply install it thought brew:
brew install step - Initialize step-cli by running
step ca bootstrap --ca-url https://<step-ca-domain>:9000 --fingerprint <root fingerprint> --install
Notice the step cli also installs the root certificate on our system, so the CA is trusted by our OS.
step ca bootstrap --ca-url https://step-ca.masterball.local:9000 --fingerprint 23e95xxxxxxxxxxxxxxxxxxxxxxx --installThe root certificate has been saved in /Users/remcokersten/.step/certs/root_ca.crt.The authority configuration has been saved in /Users/remcokersten/.step/config/defaults.json.Installing the root certificate in the system truststore... Password:done.- To generate a certificate and sign it, we need a one-time token. Generate a token with
step ca token <Subject Alternative Name>and save is to a variable to use it in the next step.
In this example I’ll create a token for fortigate.masterball.local and save in the TOKEN variable. When you get promted for the provisioner key, this is the administrative password
TOKEN = $(step ca token fortigate.masterball.local)✔ Provisioner: admin(JWK)[kid: qFdStxxxxx - xxxxxxxxx - xxxxxxxx]Please enter the password to decrypt the provisioner key:- Now create a certificate and let step-ca sign it. The command to do so is
step ca certificate --token <created token> <SAN name> <filename for certificate> <filename for key>
In this step I’ll create a certificate for fortigate.masterball.local and let the CA sign it by providing my generated token.
➜ ~step ca certificate --token $TOKEN fortigate.masterball.local fortigate.crt fortigate.key✔ CA: https://step-ca.masterball.local:9000✔ Certificate: fortigate.crt✔ Private Key: fortigate.key- Your certificate and key are now stored in your working directory. Keep them safe!
Step 3: Add the certificate to FortiGate
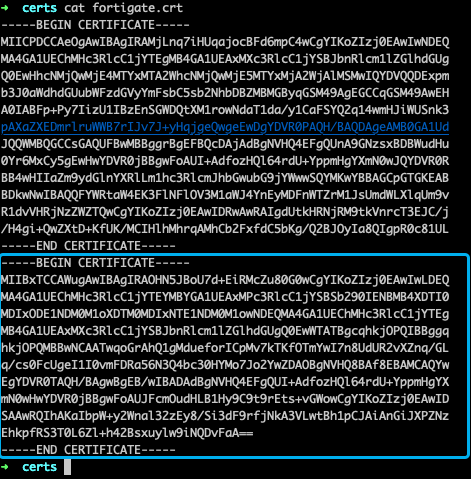
- The certificate file contains two certificates: the certificate for the FortiGate itself, and the intermediate certificate. We need to grap the intermediate certificate and import in before importing the FortiGate certificate. Open the fortigate.crt file and cut the last block into a separate file. Call this file something like intermediate.crt
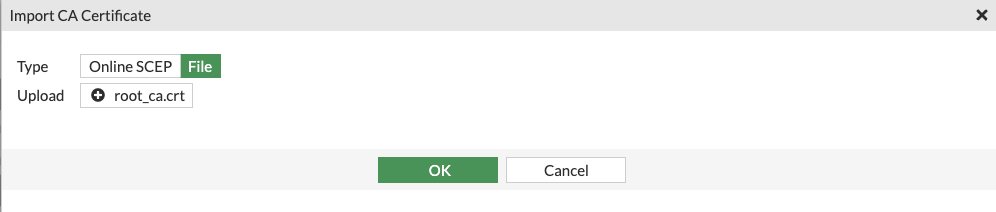
- Log in to your FortiGate and install the root (stored in the .step folder in your home folder) and intermediate certificate under System -> Certificates -> Import -> CA certificate
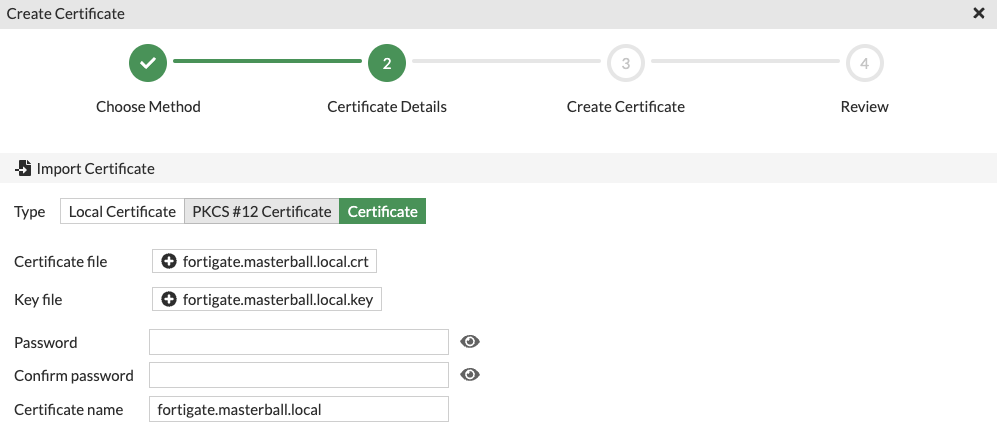
- Install the generated certificate for fortigate under System -> Certificates -> Import -> Certificate -> Import Certificate
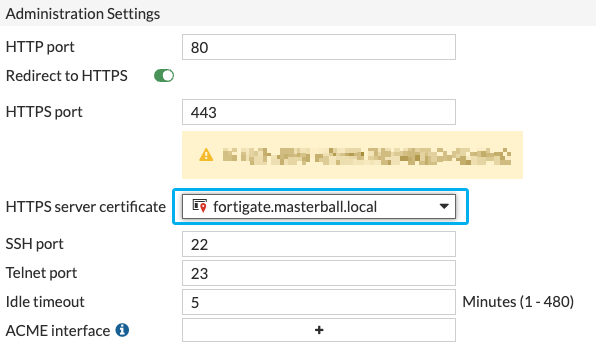
- Under System -> Settings bind the HTTPS server certificate with the imported certificate
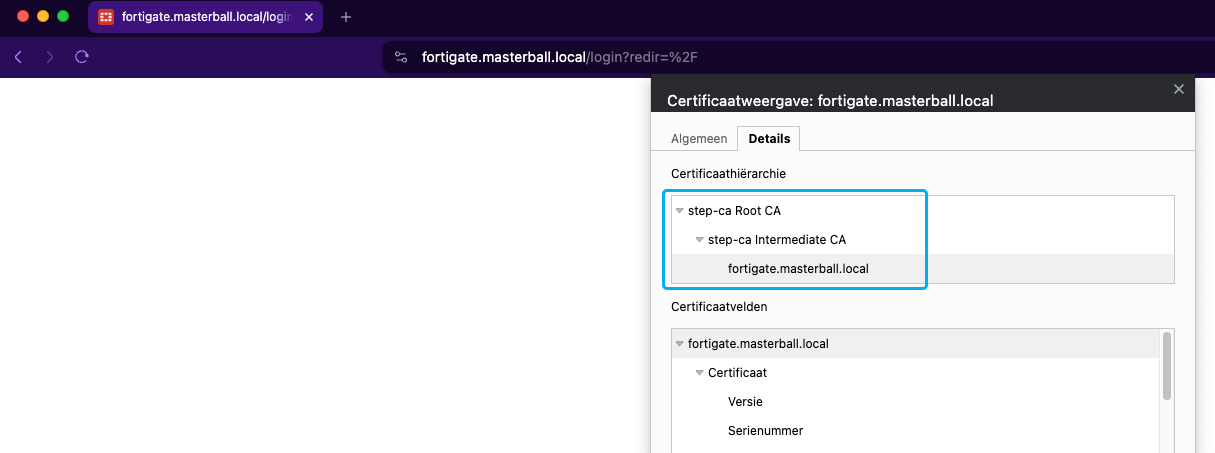
- Now, when navigating to the FortiGate web interface, the connection is secure with the certificate hierarchy we created.
Conclusion
That’s it! Now my home network is more secure with certificates managed by my own CA, so hopefully my cat can’t capture my credentials.