- Step 1: Export Data from an Existing Container or Volume
- Step 2: Create a Volume on Longhorn
- Step 3: Create a Pod to Import the Data
- Step 4: Copy the Tar File into the Pod
- Step 5: Clean Up
- That's It!
Importing Data into Longhorn
How to Import Existing Data into Longhorn Volumes on a Kubernetes Cluster
Written by Remco Kersten
Recently, I deployed my Kubernetes cluster in my homelab and decided to use Longhorn as the storage provider. One question that came up was: How do I import my existing data into Longhorn volumes?
In this guide, I’ll walk you through the process of exporting data from an existing container, creating a Longhorn volume, and importing that data into the new volume. Let’s get started!
Step 1: Export Data from an Existing Container or Volume
First, we need to export the data from the existing container.
- Open a Shell in the Running Container
Usedocker execto open a shell in the container you want to export data from:
sudo docker exec -it gitea /bin/sh- Archive (Tar) the Data
Navigate to the directory where your data is stored and compress it into a tarball for easy copying:
cd /data/lsgit gitea sshtar -czf gitea.tar.gz .- Copy the Tarball from the Container to your host
Exit the shell and usedocker cpto copy the tarball to your host:
docker cp gitea:/data/gitea.tar.gz .Successfully copied 10.3MB to /home/remco/.Now that we have exported the data, let's move on to creating the Longhorn volume where we will import this data.
Step 2: Create a Volume on Longhorn
There are different ways to create a volume in Longhorn. For simplicity, we'll use the Longhorn UI to create a Persistent Volume Claim (PVC).
- Create a Persistent Volume Claim (PVC)

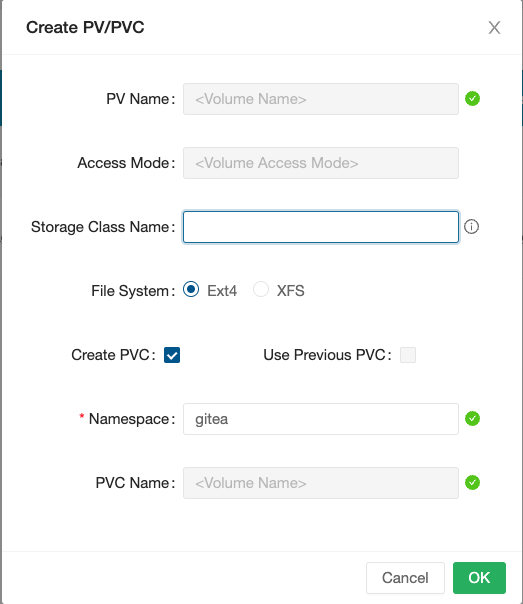
- After creating the PVC via the Longhorn UI, you can verify its existence in the desired Kubernetes namespace:
kubectl get pvc -n giteaNAME STATUS VOLUME CAPACITY ACCESS MODES STORAGECLASS AGEgitea-data Bound gitea-data 10Gi RWO longhorn-static 22s- Once the PVC is bound, you're ready to import the data into the Longhorn volume.
Step 3: Create a Pod to Import the Data
To copy the data to the Longhorn volume, we’ll need a pod that can mount the volume. For this example, we’ll use a simple busybox pod, but you can use any container you prefer.
- Create a Busybox Pod
Below is a YAML file to create a busybox pod that will sleep for an hour, giving us time to copy and extract the data.
---apiVersion: v1kind: Podmetadata: name: busybox labels: app: busyboxspec: containers: - image: busybox name: busybox command: - sleep - "3600" volumeMounts: - name: data mountPath: "/data" volumes: - name: data persistentVolumeClaim: claimName: gitea-data- Apply the YAML file using kubectl:
kubectl apply -f busybox.yaml -n giteaVerify the Pod is Running
- Check that the pod is up and running with the following command:
$ kubectl get pods -n giteaNAME READY STATUS RESTARTS AGEbusybox 1/1 Running 0 70sgitea-5df8b6db65-6fkc8 1/1 Running 0 25mNow that the pod is running, we can proceed with copying the data.
Step 4: Copy the Tar File into the Pod
- Use the
kubectl cpcommand to copy the tar file into the busybox pod, specifically to the /data directory:
kubectl cp -n gitea ./gitea.tar.gz busybox:/data/- Open a shell in the busybox pod and extract the Tar File
kubectl exec -n gitea --stdin --tty busybox -- /bin/shcd /datatar -xzf gitea.tar.gzStep 5: Clean Up
- Once the data is successfully imported, delete the Tar file and delete the busybox pod to free up resources. If you used the provided YAML file, simply run:
$ kubectl delete -f busybox.yaml -n giteaThat's It!
You’ve now imported your existing data into a Longhorn volume. You can deploy your applications and attach the Longhorn volume as needed.
With this approach, you can easily migrate your data from old containers or volumes to new Longhorn-backed PVCs in your Kubernetes cluster.
Feel free to customize this process depending on your setup. Longhorn makes managing persistent storage in Kubernetes seamless, even in homelabs!